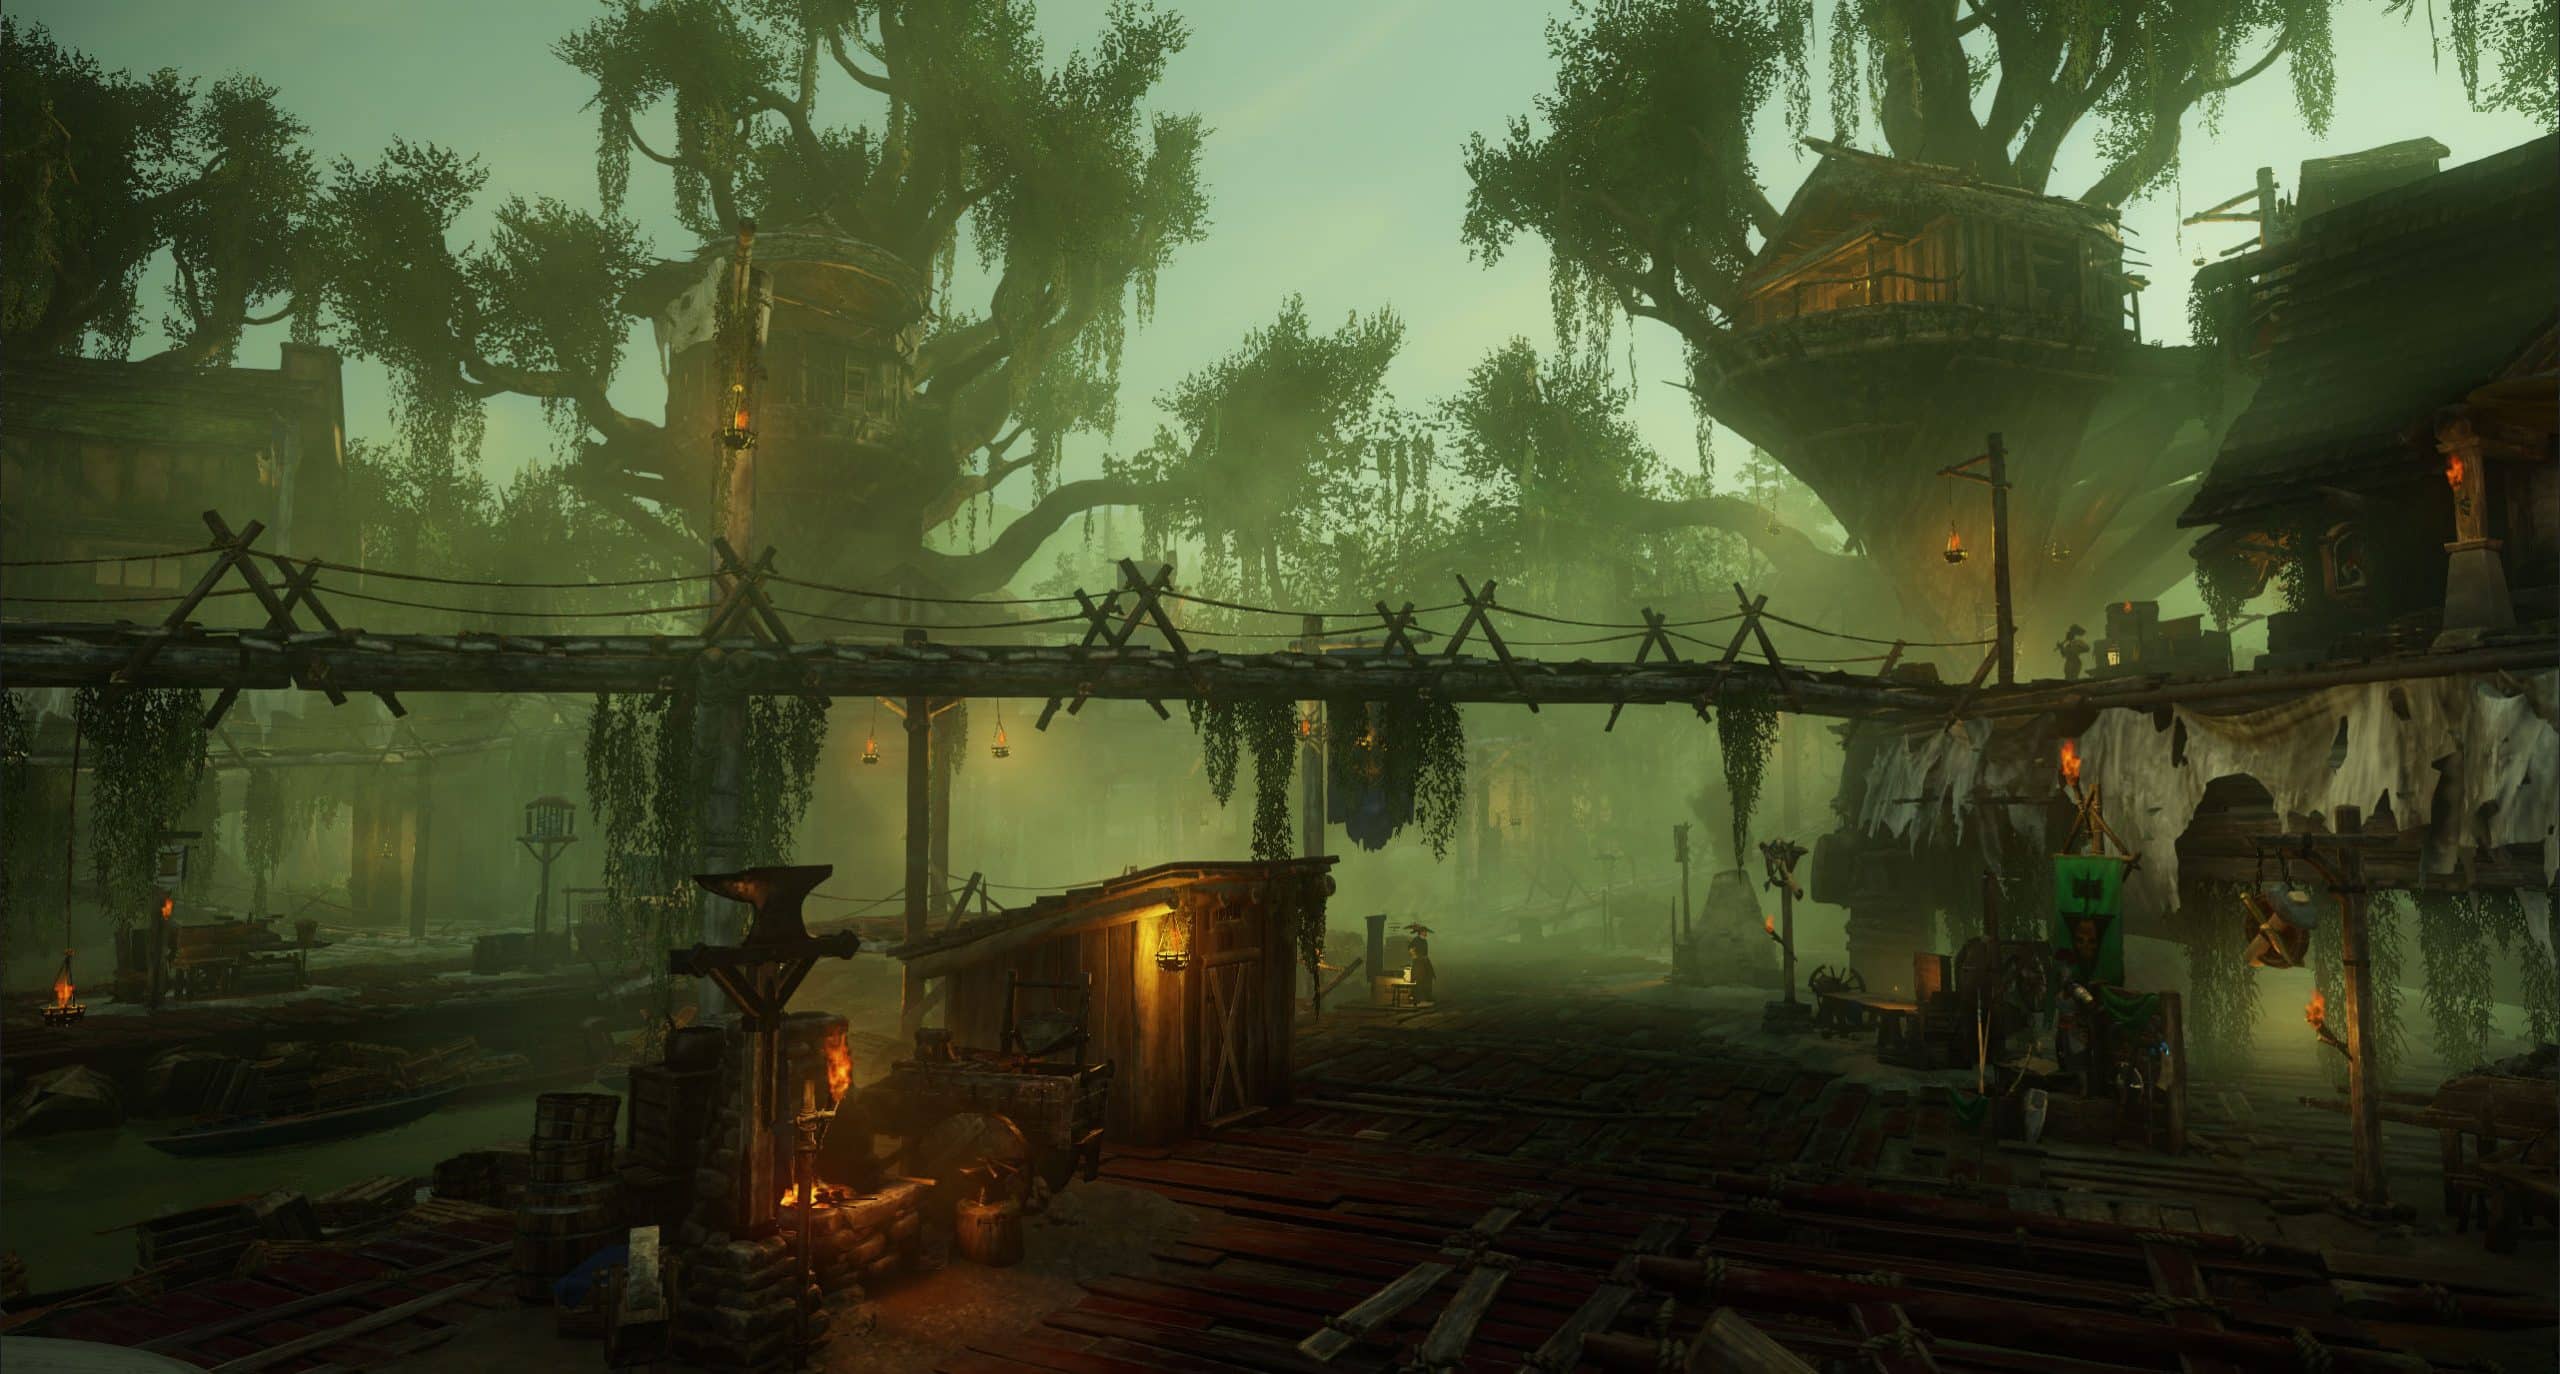
Reekwater is home to the best place to find High-End Trophy Mats. We will walk you through the most optimal route to loot these items and more in our Reekwater Supply Stockpile Guide.
Quick note – Ancient Chests and Supply Stockpiles both hold trophy mats and will be mapped out in this guide.
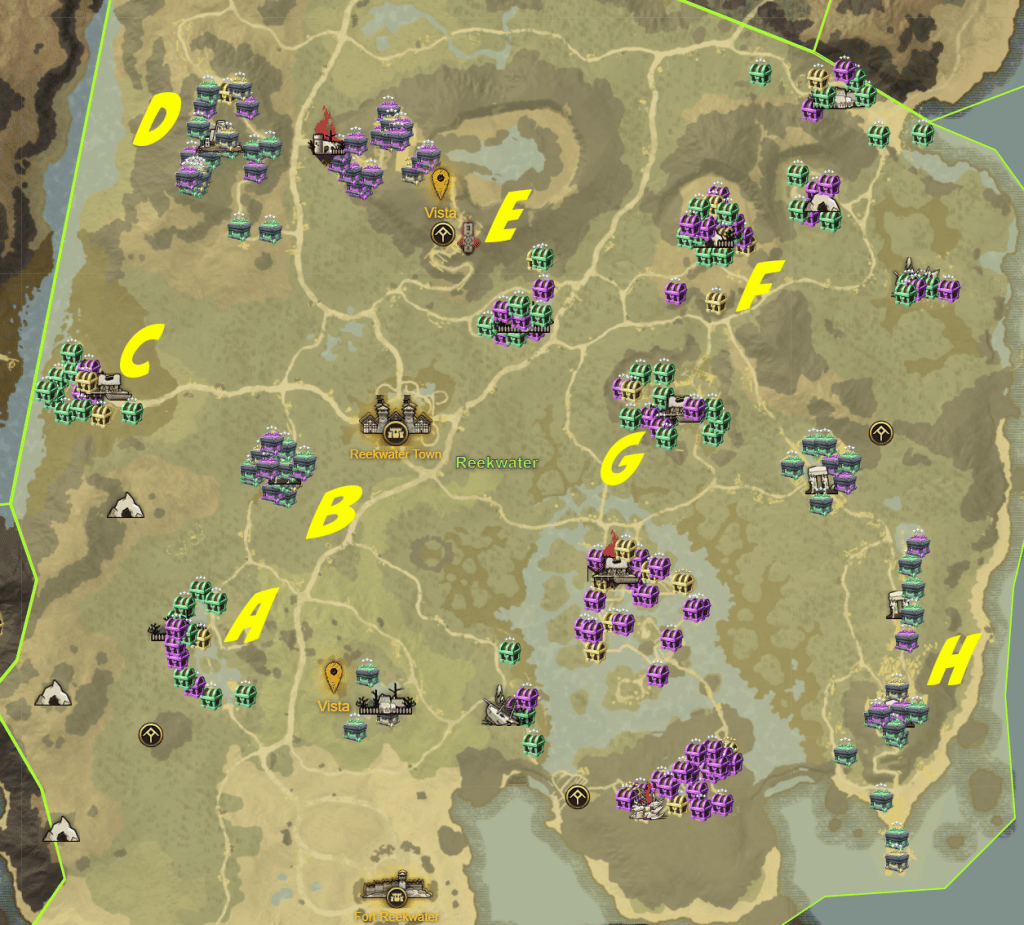
First, let’s look at the points of interest you’ll visit in the Reekwater Supply Stockpile Run
A. Fisher’s Glory
B. Sunken Aspect
C. Rosswater Bourg
D. Skyview Repose
E. Glimmerfin
F. Virid Grotto
G. Mistywater Thorp
H. Sylelo Seko
Fisher’s Glory and Sunken Aspect
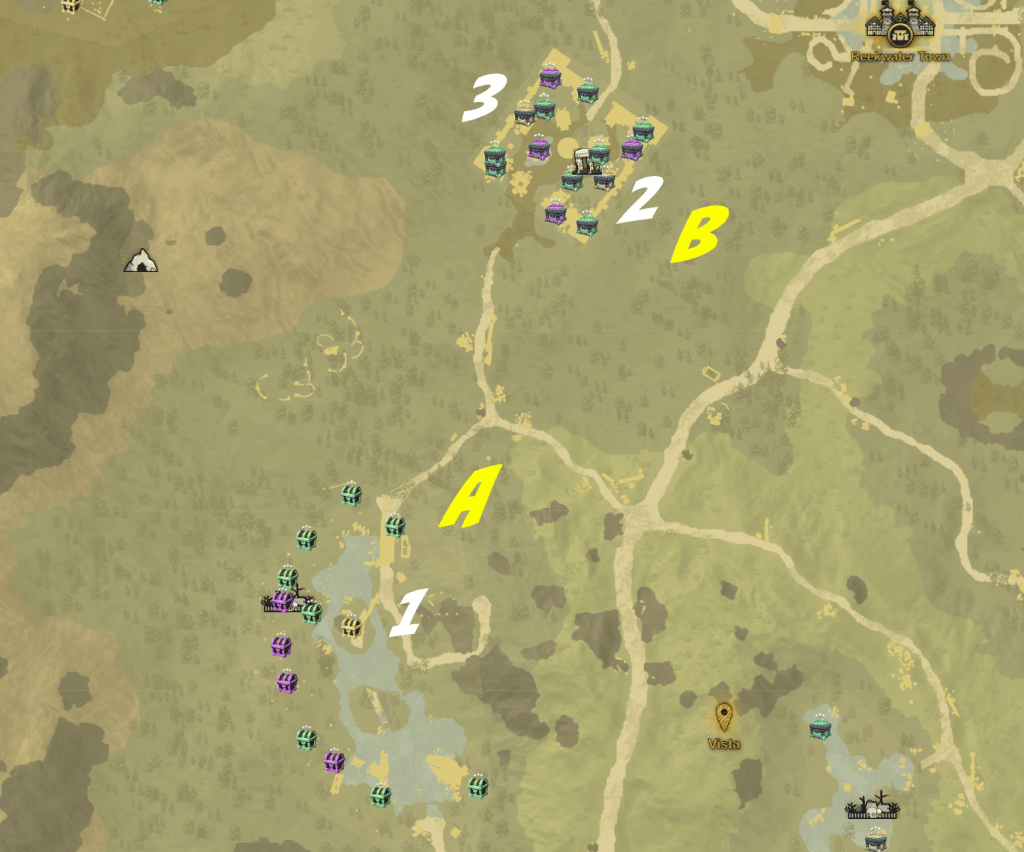
You’ll start your journey at the top of Fisher’s Glory. Head up to the very top of the Point of Interest and loot Supply Stockpile 1. It will be Guarded by an Angry Earth Warden. Jump down and head over to the Sunken Aspect.
The two Ancient Chests (2&3) can be found on the upper walkways of the Sunken Aspect. These can be tricky to get to at times since there are several Angry Earth tentacle mobs guarding the area. De-aggro these when possible and loot the two Chests. Once finished, head over to the Mosswater Borg.
Mosswater Borg
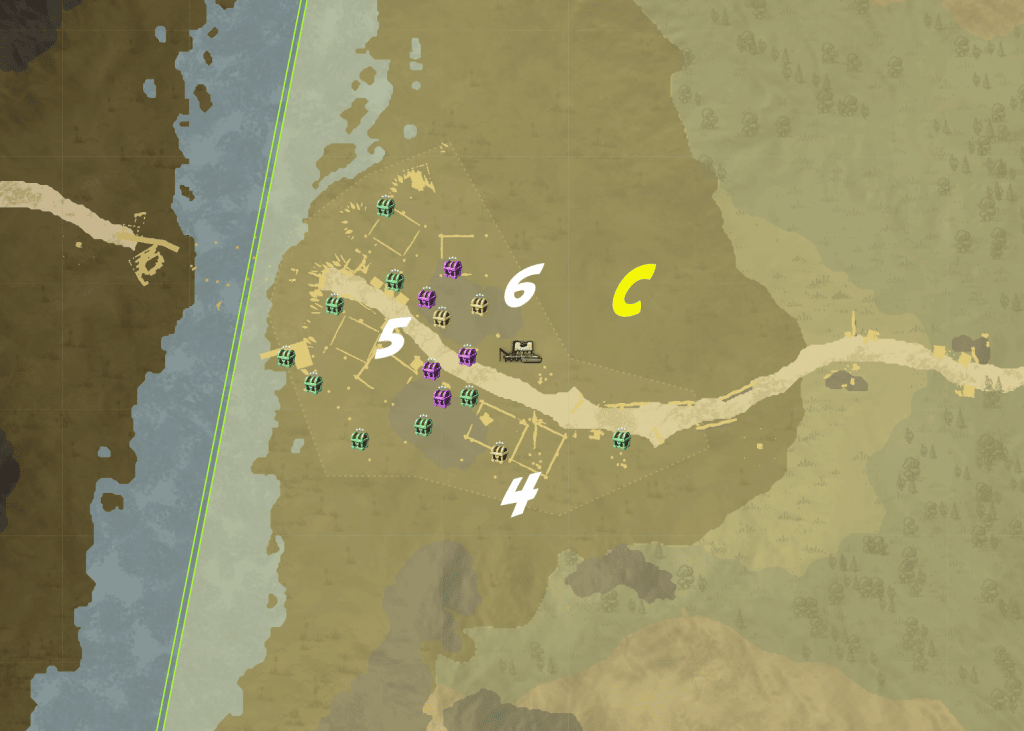
Looting the Mosswater Borg is pretty straightforward. Head up the southern set of stairs towards supply stockpile 4. Here, you can jump over the stockpile and go under the stairs for easy looting. Next, head up to the top of the point of interest, into the house with Stockpile 5. Here, you can hop on the chest to de-aggro the mobs, then loot the stockpile.
Next, go back out of the house and jump off the staircase to your left. You will want to land on the roof of the building below. Once on the roof, head to the west side of the building and edge yourself off the roof to the narrow walkway below. Now you should be behind stockpile 6 to the north and should be able to easily loot it.
Finally, Jump over the ledge to your north and head to the southeast entrance of Skyview Repose. Once close, you will need to parkour your way up the cliffs to the entrance and stockpile 7.
Skyview Repose
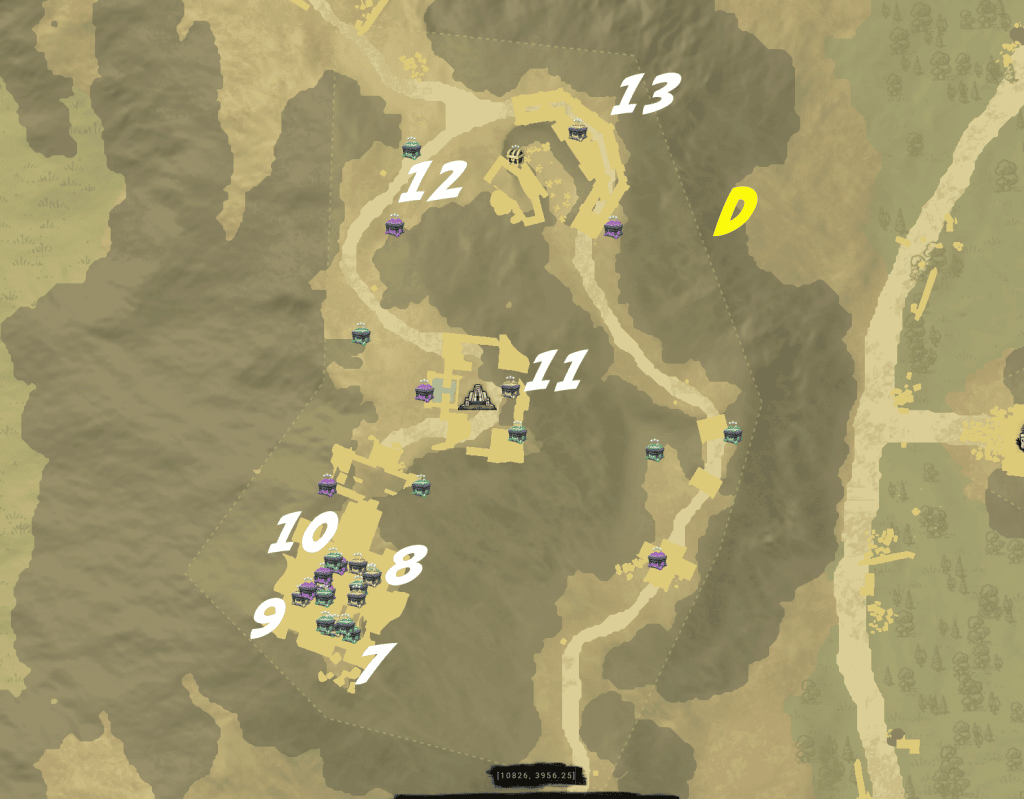
Once through the door, go past the stairs to the left and around to an Ancient Chest (7). Next, head back up the stairs you passed and head upstairs. Keep going up til you spot another Ancient Chest in the corner (8).
The Next two 9 and 10 are a little tricky to find. As you continue up the stairs you will see a long set of stairs that takes you towards the west. There will be a pillar off to the right with a ledge you can hop to. Behind the pillar, you’ll find the next Ancient chest (9).
From here hop back onto the stairs and continue up. You will notice that the stairs move to the right as you head north. On the platform with the ancient coffer, head to the ledge to the east. You should notice a very narrow ledge to the right of the stairs. Slowly cross the ledge and look under the stairs for Ancient Chest 10.
Finally, go back out to the stairs, head up, then outside. There are 3 Ancient Chests along the path starting with the one behind the Surgeon World Boss. Loot, then head to the north for the next Ancient chest. Climb the hill to the north then head east around the path to the final Ancient Chest of Skyview Repose.
Jump down the cliff to the east and head towards Glimmerfin (F).
Glimmerfin, Virid Grotto, and Mistywater Thorp
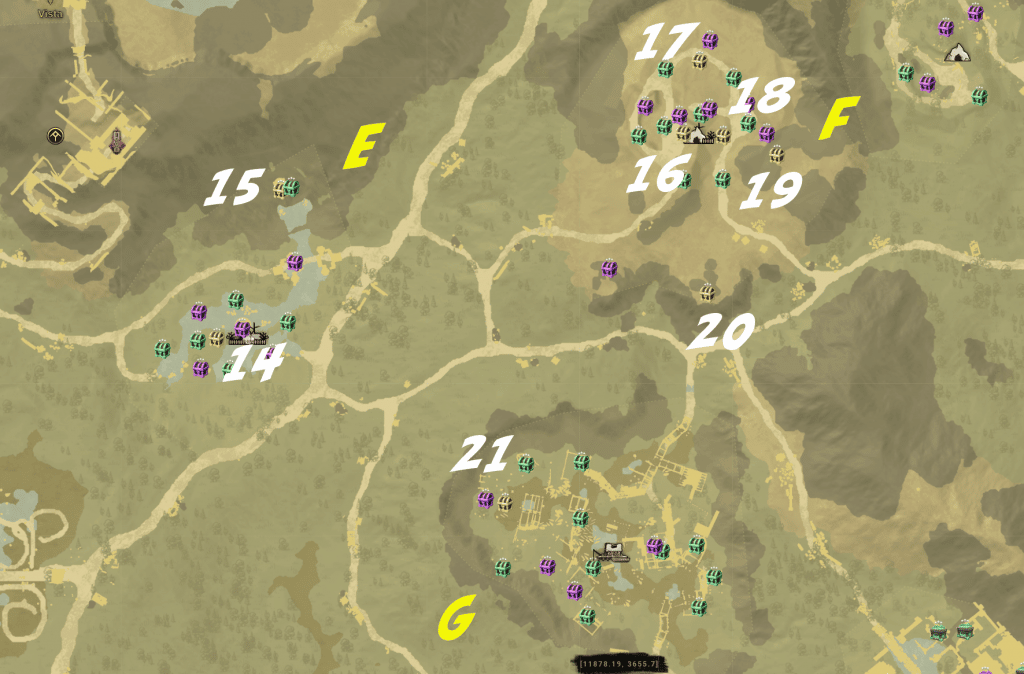
Head to the middle of Glimmerfin Swamp to loot chest 14. It should be around the east side of the large tree in the middle. Then, head to the cave to the north and grab the supply stockpile(15) at the back of the cave. Leave the cave and head over to the Virid Grotto.
Enter the Western cave and head down to the right. Be cautious of the Angry Earth mobs below. Kill them and loot the Supply Stockpile (16). Then head up to the right to Supply Stockpile 17 and 18. Next, head out of the Grotto and immediately to the left into another cave. You will see you’re next Supply Stockpile (19). Finally, head south to Mistywater Thorp (G). Grab Supply Stockpile 20 on the south side of the giant tree along your way.
There is a tower to the far west of Mistywater Thorp that you can head up. There will be Lost Boss with a cannon on his back. Climb up into the shipwreck above Supply Stockpile 21 to de-aggro this mob then hop back down to behind the Stockpile to loot it. Then, head south to Sylelo Seko (H)
Sylelo Seko
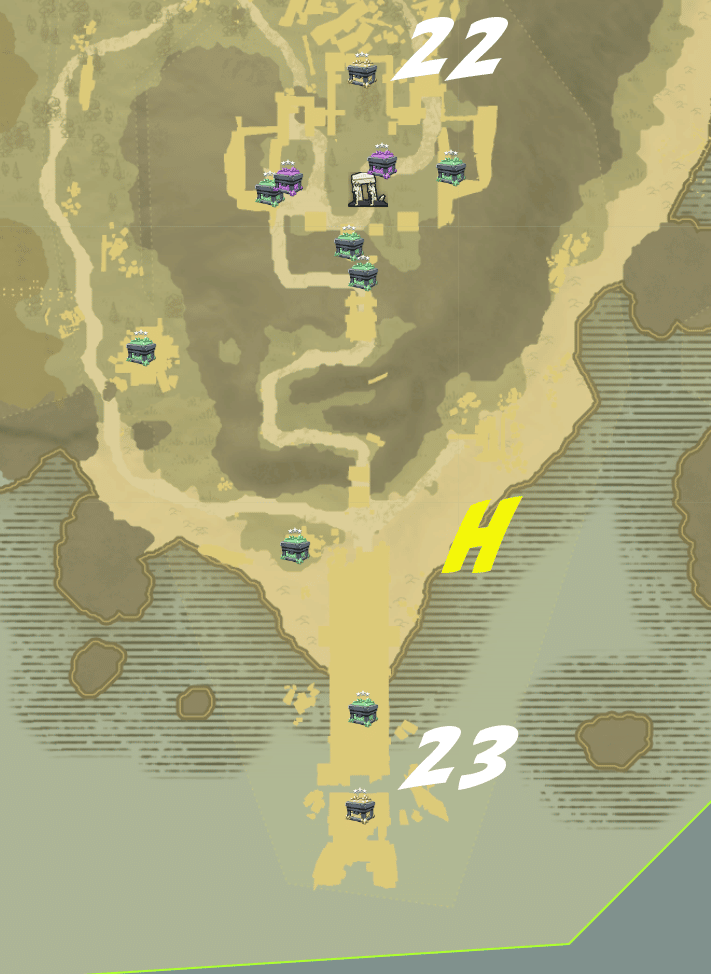
For the final two chests head into the Sylelo Seko Temple by running around the south entrance. Once inside, head all the way back through the doorway to the north end of the temple to loot the Ancient Chest 22. From there run back out the south Entrance and all the way to the broken bridge to the south. Here you’ll find the final Ancient Chest (23).
Reekwater Supply Stockpile Guide Conclusion
That completes our Reekwater Chest Run Guide! For another Supply Stockpile run, check out our Ebonscale Guide! For more New World Aeternum guides be sure to check our comprehensive guide library!

