Introduction
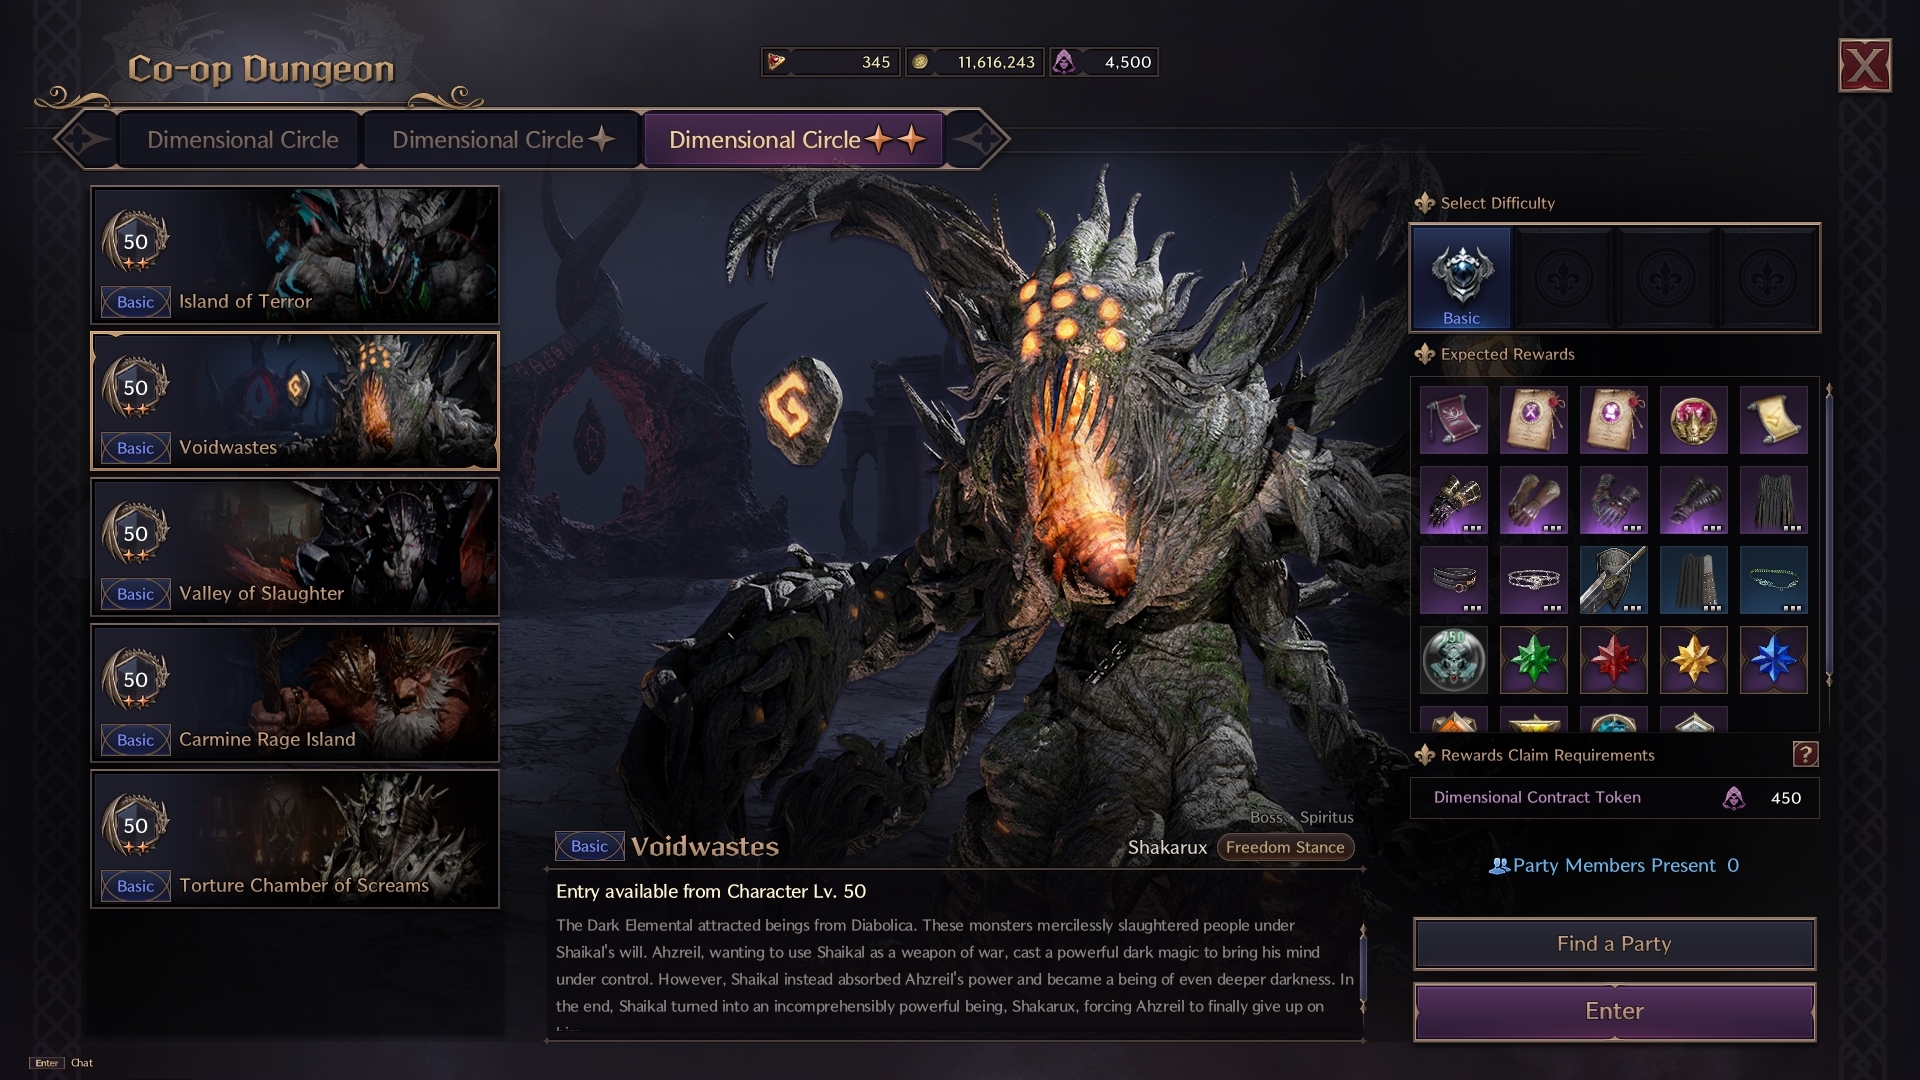
In the Voidwastes Dungeon Guide, we’ll explain and take you through a step-by-step of how to progress and beat the final boss to clear this particular Tier 2 dungeon. Tier 2 dungeons in Throne and Liberty provide incredible rewards to aid the next level of progression. However, the typical Tier 2 dungeon is far more difficult and requires high-end gear (+9 Epic Grade) to complete.
Trash Clearing, Mini-bosses and Pre-Final Boss Objectives
Just like in every other Dungeon in Throne and Liberty, there is a slew of objectives, basic mobs and a couple of mini-bosses to kill if you want to reach the main boss. This applies to both Tier 1 and Tier 2 dungeons also. However, in this guide, we’ll be focusing on how to defeat the final boss of the dungeon – the hardest part by far. As a result, make sure to check back for the full breakdown of the Voidwastes dungeon guide here in the near future. Finally, keep in mind these objectives while pushing through the Voidwastes:
- Clear out any unavoidable trash mobs to ensure you don’t over-pull mobs.
- Check your current objective(s) on the right-hand side of the screen and complete them accordingly.
- Most mini-bosses have minimal if any mechanics, just be sure to stay healthy, dodge attacks and deal damage.
- Pick up any Resurrection Gate where possible.
PLEASE NOTE: The guide below is the COMPLETE guide of the dungeon – all mechanics included. However, some of the mechanics are stripped away in the “base” version of the dungeon. These mechanics are added back in the “Challenge” mode at certain Tiers of difficulty. As a result, the base version of the dungeon is much easier than you might expect after seeing all the mechanics below.
Final Boss – Shakarux
Shakarux is the main boss of this Tier 2 dungeon. Also, Shakarux shares a small amount of mechanic similarities with Shaikal, the final boss of Cursed Wasteland (Tier 1).
Block Attacks
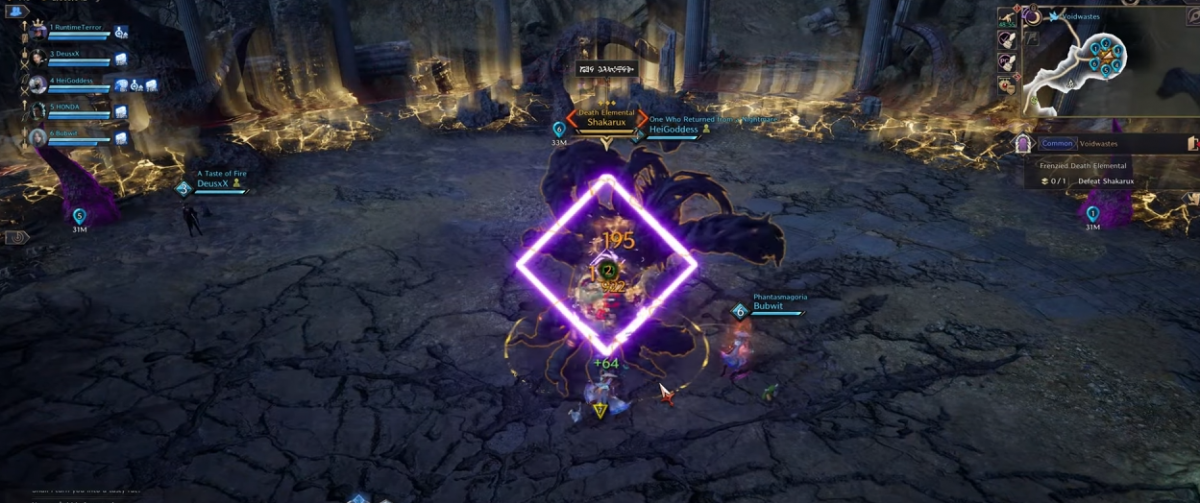
There is two forms of attacks that every player in the dungeon should be aware of and ready to block. The first is a generic attack indicated by a purple circle that hits in AoE. The second is actually indicated by a diamond-shaped purple indicator. As a result of the indicator being different, you’ll need to use your rolling block (hold a movement key + press block). At the beginning of the Shakarux’s fight, Shakarux usually leads with either of these two block attacks – usually a movement block.
Beam Soak Phase
After the first block attack, each of the purple horns located on the edges of the arena emit a giant purple beam towards the boss. These beams need players to soak them in order to stop the beams from reaching the boss. If the beams manage to reach the boss, the boss gains explosive stacks, that upon reaching 30 stacks – causes a party wipe. As a result, blocking the beams is mandatory for progressing the fight. However, the player(s) soaking the beams also gain stacks, reaching 30 on a player results in that player instantly dying too.
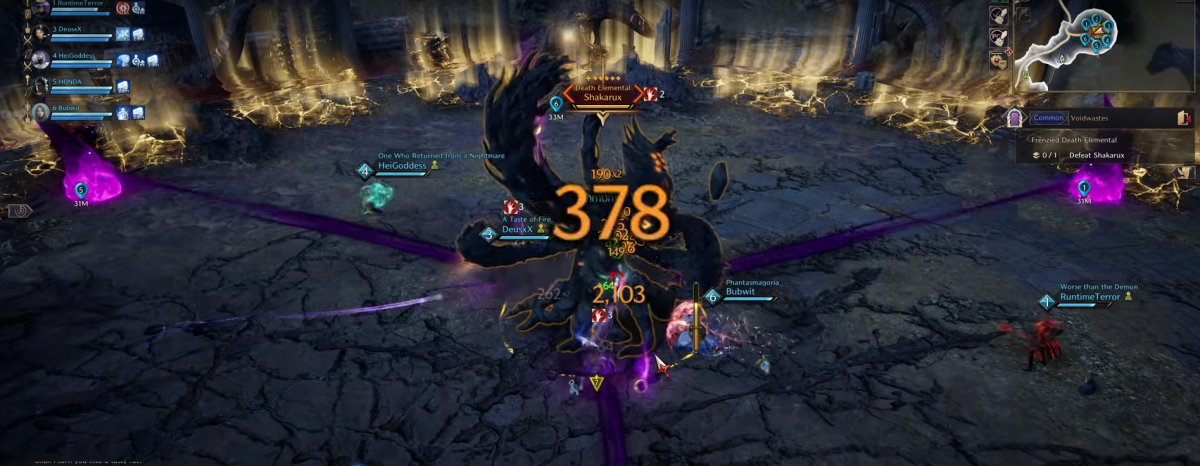
To prevent any solo or party wipes, the party can split into three groups of two players. The first player assigned to each beam can begin to soak it and gain stacks, then call for their “partner” to take over and soak some. Remember that you have the ability to use pins to determine where people are standing to line up and the directions of the beams.
Red Orb
Periodically, Shakalux selects a player in the party to put a red orb above. Within a few seconds of being placed on a player, the orb spills out onto the ground directly beneath the target player. As a result, a huge black hole starts sucking every player in the radius into the center, dealing damage. This orb works similarly to Shaikal’s red orb in the Cursed Wasteland. However, players need to work together to juggle the orb and soaking the beam.
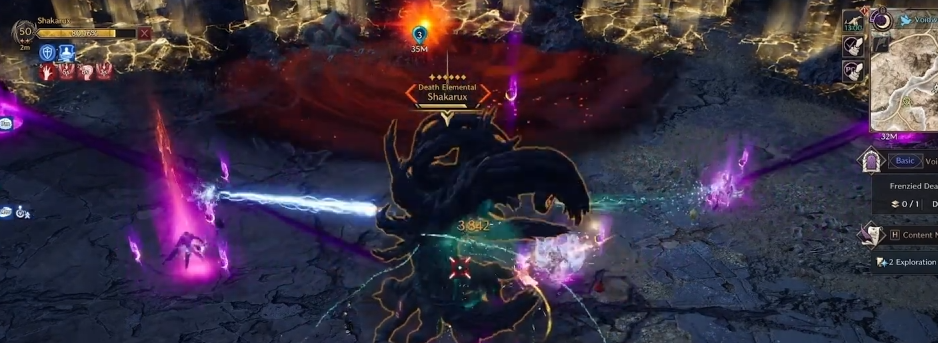
To make the orb mechanic easier, if you’re currently soaking the beam, run the orb right next to the purple horn. Doing this helps you have enough space to run up close to your teammate and still soak the beam for them.
Breath Phase
The Breath phase is a very complicated-looking mechanic at first. However, broken down you’ll be able to clearly figure out each part. The mechanic occurs in the following order:
- Two gold Acid Pools randomly drop under players due to a boss attack, this indicates the start of the phase.
- There’ll be tons of randomly placed spots of gold rifts across the arena.
- Each player is going to gain a light blue ring around them.
- The player marked with the gold orb above their head has to run on the side of the outer horns with a gold orb above it.
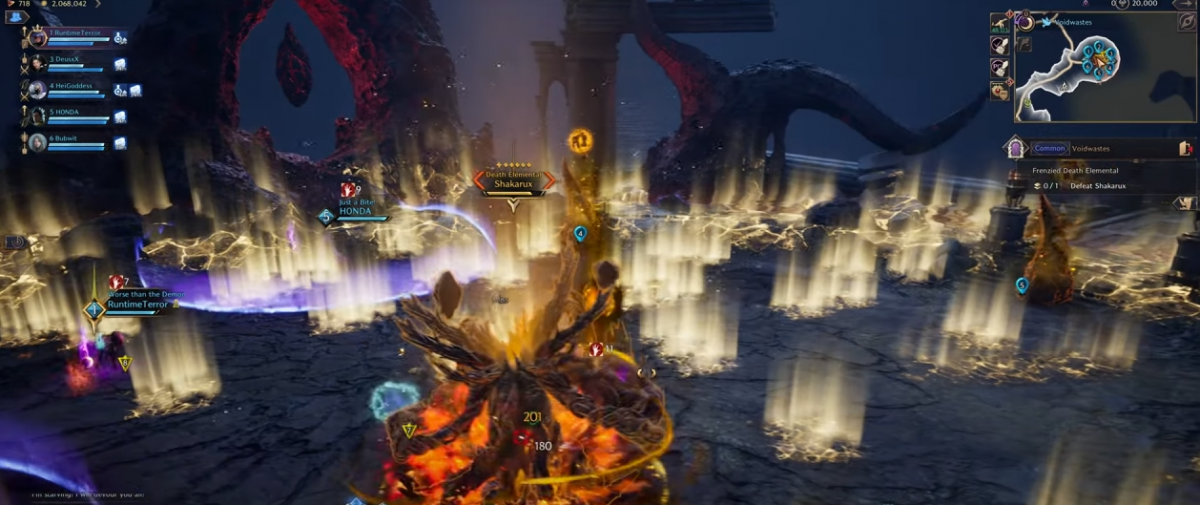
Players with the circles around can find space in the arena to prevent walking into each other. This is important, if players with circles around them walk into each other – each are CC’d. Meanwhile, the player with the gold orb after preparing the breath direction can run towards the side of the boss. Doing the mechanic this way allows each player some space and safety. The boss expels a huge amount of gold breath across the golden horns outside the arena.
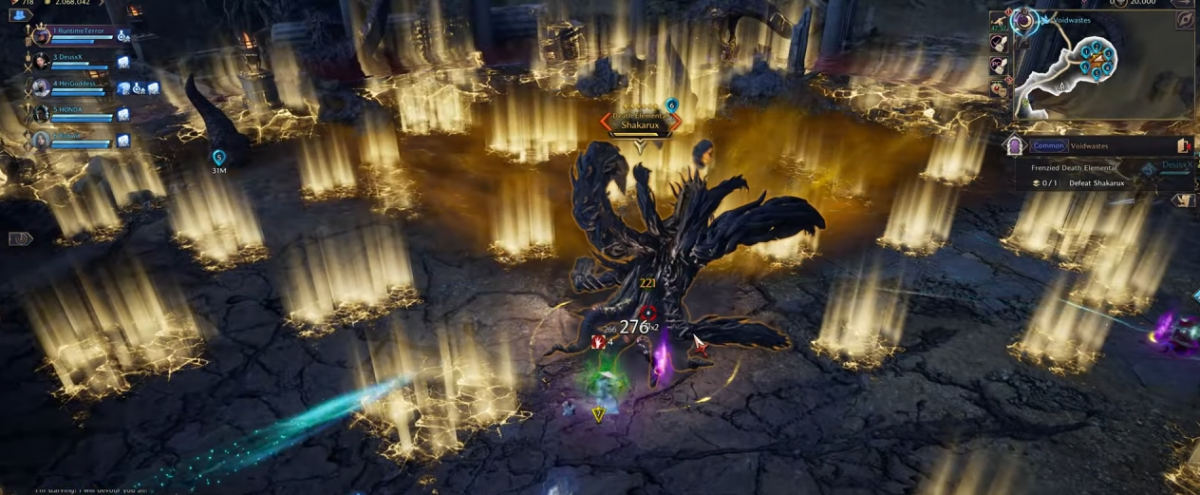
The gold horns on the outer edge of the arena is the target that needs the breath to pass over to destroy it.
Health Check Phase
Immediately after the breath mechanic, every play receives a golden orb above their head. This mechanic is a health check, dealing huge unavoidable damage. As a result, keep everyone’s health topped up throughout the fight as much as possible.
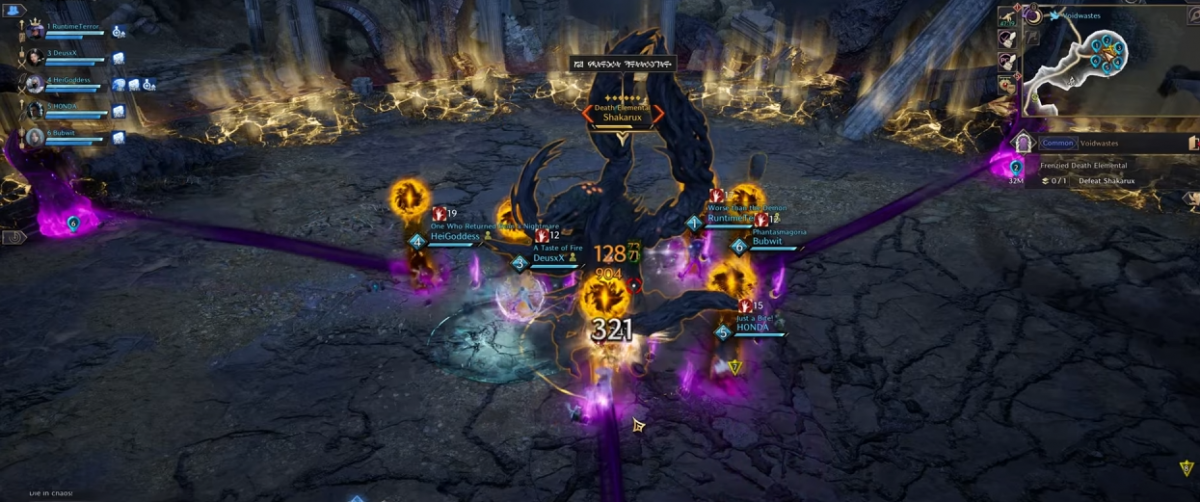
Finally, the boss mechanics reset back to the start of the fight and repeat. As a result, try to keep the boss below 10 stacks and be careful of your own beam stacks. Repeat the mechanics until you defeat the boss!
Tier 2 Dungeon Rewards
Tier 2 Dungeons provide the next step of progression rewards for players. As a result, each chest looted costs 450 Dimension Tokens compared to the 300 a Tier 1 dungeon chest costs. The power of Tier 2 materials, weapons and armor, however, is a huge step up from Tier 1.
Challenge Difficulty
Challenge mode is a Mythic+ styled system in Throne and Liberty. Each week, two dungeons are selected to become Challenge mode dungeons. Tied into these two dungeons is a set of “affixes” that change some of the rules in the dungeon. For example, an affix can make it so totems spawn and stun players periodically.
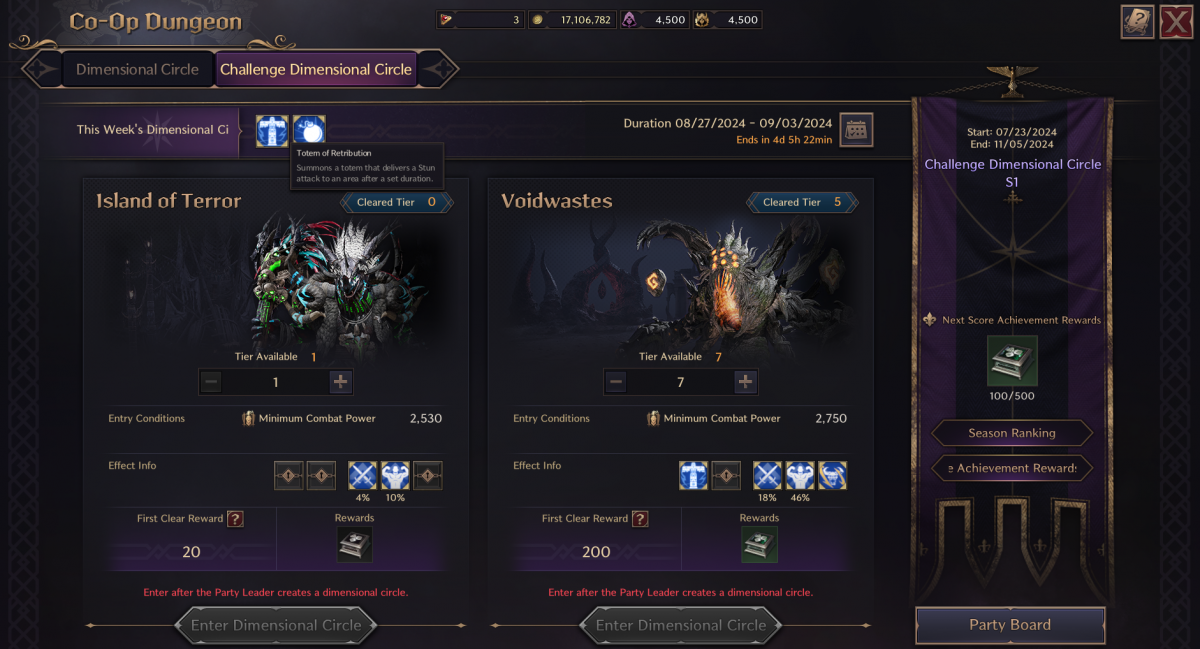
As soon above, depending on the difficulty tier you select, additional mechanics for the dungeon are added (seen in the “Effect Info” section). The Tier breakpoints for each new mechanic is Tier 5, 9 and 13. Below is the list of mechanics that are added to Voidwastes:
- The Crowd Control rings become a mechanic in Tier 5.
- One outer horn starts fully glowing gold and spawns a gold rift wall that has to be disabled by interacting with the horn (plus an additional horn has to be covered by the breath).
- An additional Wrath Attack from the boss that needs to be directional dodged after the Breath Phase.
The Voidwastes Dungeon Guide Conclusion
This sections concludes the Voidwastes Dungeon guide for Throne and Liberty. For more guides for Throne and Liberty, please check out our official Home page!

